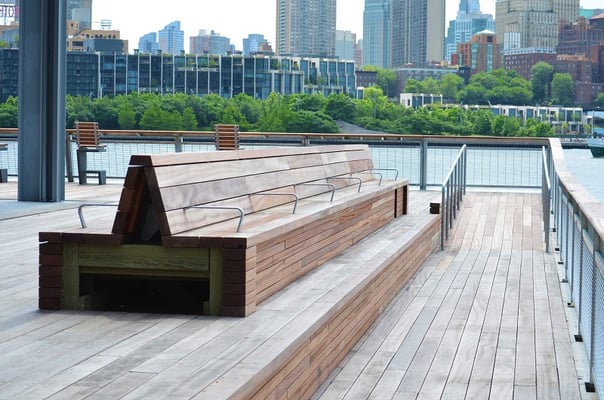

Building a hardwood deck is an all-natural and beautiful long term investment for your home - and your lifestyle. Peace of mind, relaxation, entertainment and outdoor living are some of the key benefits of extending the living space of your home outside. The long-lasting durability of a hardwood deck makes it very important to install it properly, so it can become a long term sanctum of enjoyment. This installation used Mataverde® Ipe hardwood for the decking, but the same principles hold true for other hardwood decking species, too.
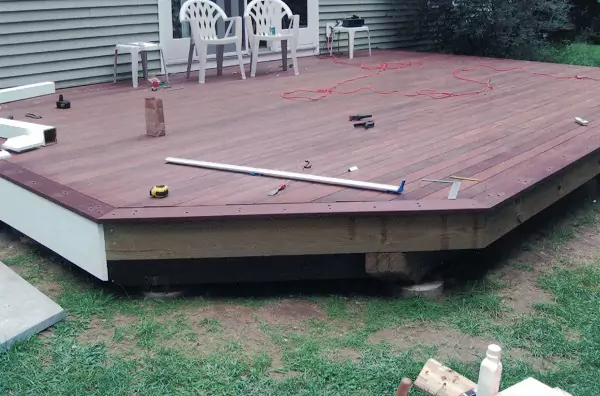
Step 1: Get the Footers and Framing right
Building a code-compliant frame with proper joists and attachments is the first step. The deck shown below is one example that achieves this goal:


Step 2: Let the Wood Acclimate Properly to its New Environment
Acclimating the hardwood decking boards properly on site is imperative for best short term and long term performance and appearance of your deck. The example shown below is a great way to allow your new deck boards to acclimate and adjust to their new location. Notice how a tarp was placed groundside to minimize any moisture from the ground to ‘wick up’ into the bottom rows of deck boards. The sides and end of the piles were left open (No tarp) so the deck boards could slowly release their moisture. Acclimation Guidelines can be found here.

Step 3: Lay the Deck Boards Out First
After the decking boards have acclimated properly, this builder laid the boards out on the deck frame so they could be artfully arranged, and matched for sizing and color and grain variations. Because this large deck has multiple deck boards in the same rows, it is important that any shrinkage in the width of the boards be matched up in each row. That way there is a uniform gap between rows of deck boards.

Step 4: Clean the Dirt and Debris off Your Decking
If you are finishing your deck boards on site, keep it clean. Scrub-a-dub-dub. This builder chose to clean the debris, dirt and any potential mold off of each deck board, to properly prepare it for pre-finishing. This is an important, but sometimes overlooked step in hardwood deck construction.

Step 5: Prefinish Your Decking with a UV Inhibitive Sealer
After the cleaned deck boards had dried thoroughly, a coat of hardwood oil finish was applied. Finishing hardwood decking with an oil finish, such as Penofin Hardwood formula, serves a twofold purpose; first it makes the decking look rich and beautiful, secondly it helps protect the deck boards from harmful UV rays as it completes its on-site acclimation. Using a coat of UV inhibitor helps protect deck boards in much the same way that suntan lotion protects a baby’s skin at the beach.
Because this is a very low clearance, low ventilation deck, the oil finish was applied to all four sides of the deck boards. This helps to ‘seal out’ moisture that may rise up from the ground below the deck on the bottom of the deck boards. Because this also a hidden fastener decking installation, it should also be noted, that this step is even more important, to help minimize cupping of the deck boards over time.

Step 6: Install the Hardwood Decking
Now it is time to start installing the hardwood deck boards to the deck joists. Here, a “Bowrench’ is used to ‘persuade’ any boards that have a slight bow in them into place. (During acclimation it is common for real wood deck boards to move slightly, and this technique works great to nurture them into position.) This also helps minimize decking waste and creates a uniform gap between adjacent deck boards.

Most of the deck boards have been installed now. Well done.


It’s time to install the picture frame. This meticulous contractor pre-drilled and countersunk the screws, then plugged the screw holes with matching Ipe plugs. This helps maintain the hidden fastener appearance of the deck. A ‘skirt board is also being installed to match the client’s choice of railing system.
More information on picture framing a deck here.

The deck is nearing completion, it’s almost time to relax and enjoy after a hard day’s work.
We hope you enjoyed this article and found these Ipe hardwood decking installation tips helpful. Please visit MataverdeDecking.com for more information about decking installation, hardwood decking options and more.
Are you considering a rooftop deck? Check out the new Eurotec Deck System

Related Posts